TomTop
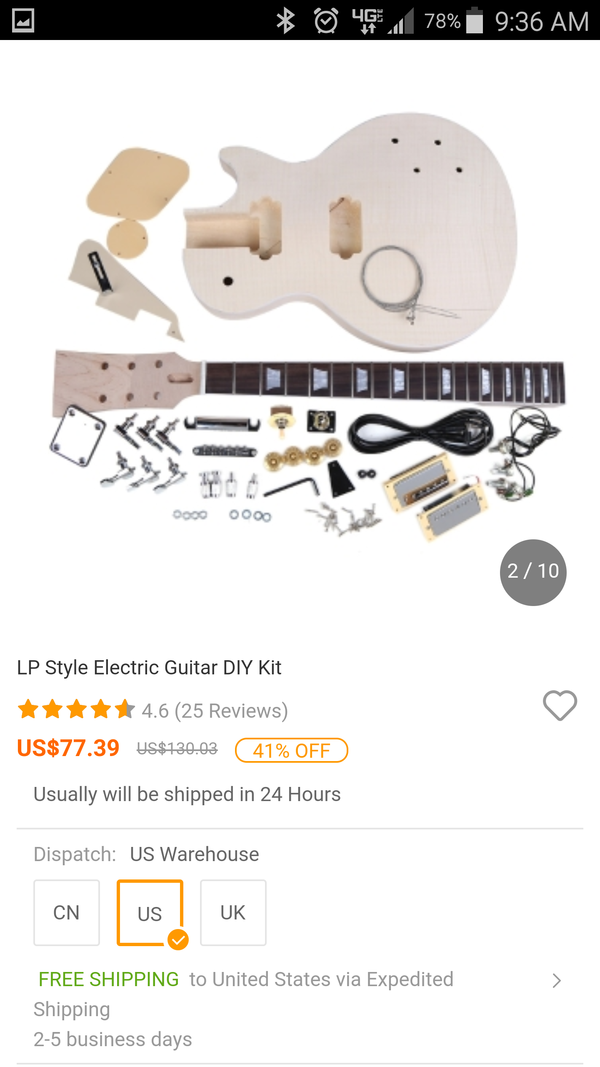
LP style guitar project
This
page is meant to document the process of building and finishing a
Tomtop $77
LP style guitar kit.Here's
the listing. No, I don't know why they picture a neck plate
with a set neck kit.
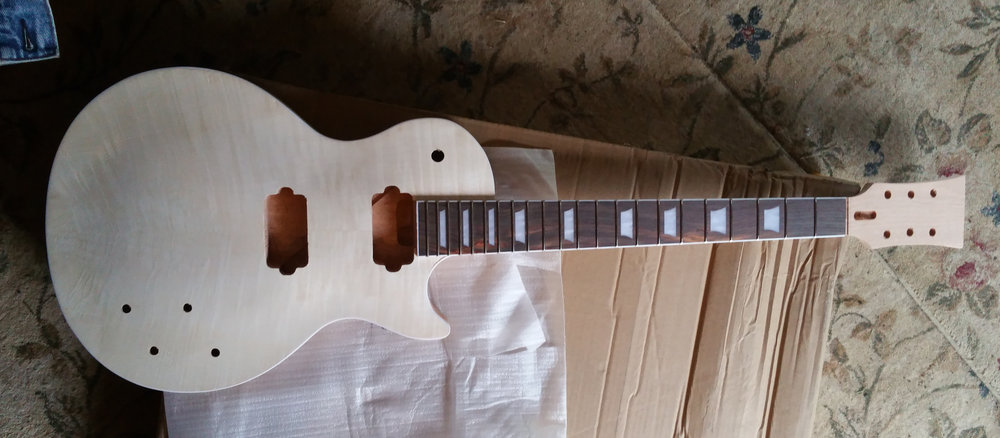
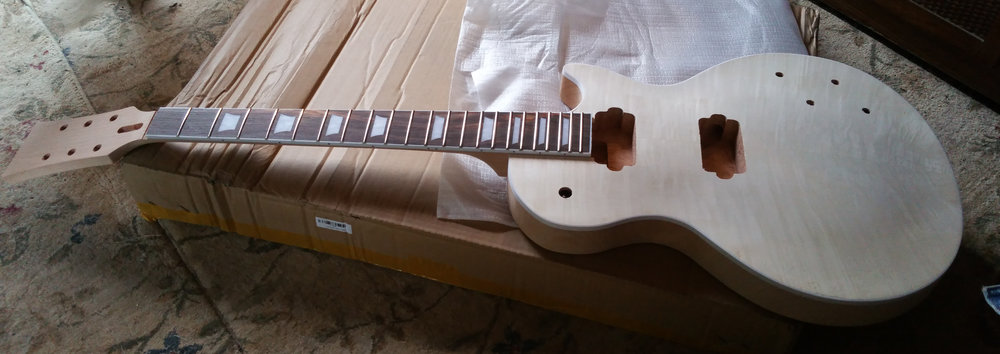
This
is what came in the box. No instructions, which I don't
think are necesssary, anyway. Not
much in the way of padding or protection for the parts, which
fortunately all seem fine.
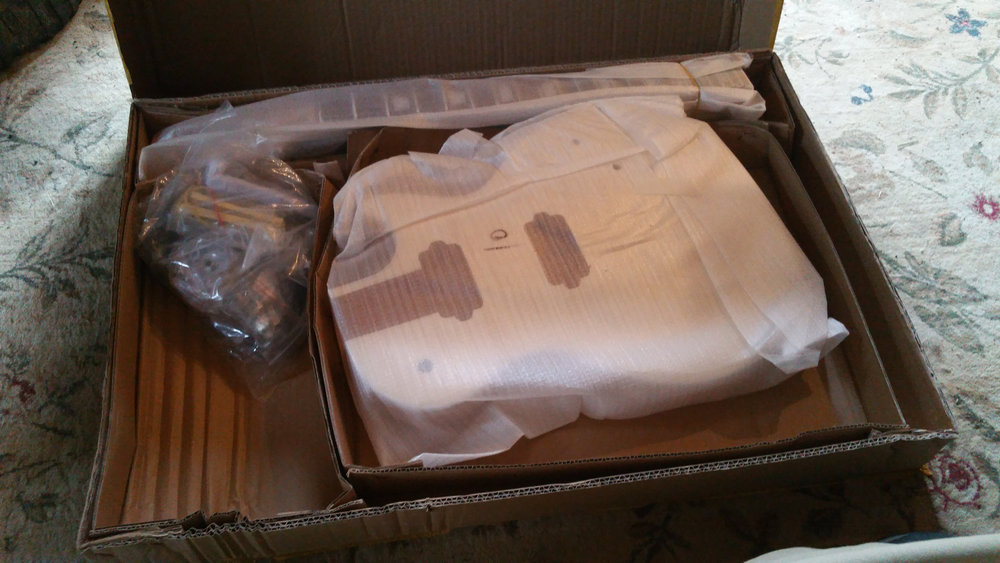
I
expect to replace all of this stuff, so I didn't even look in the bag,
yet.

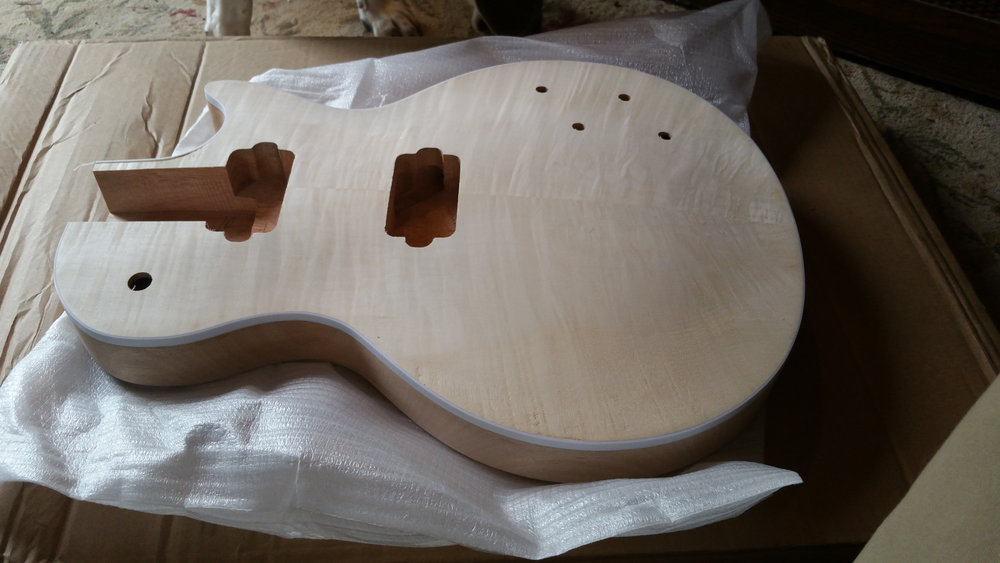
I
expected there to be a thin flame maple veneer and I was correct.
The relatively
useless Q&A on the site, clearly
answered by someone with a limited command of English, suggests it is
all mahogany, which is not correct.
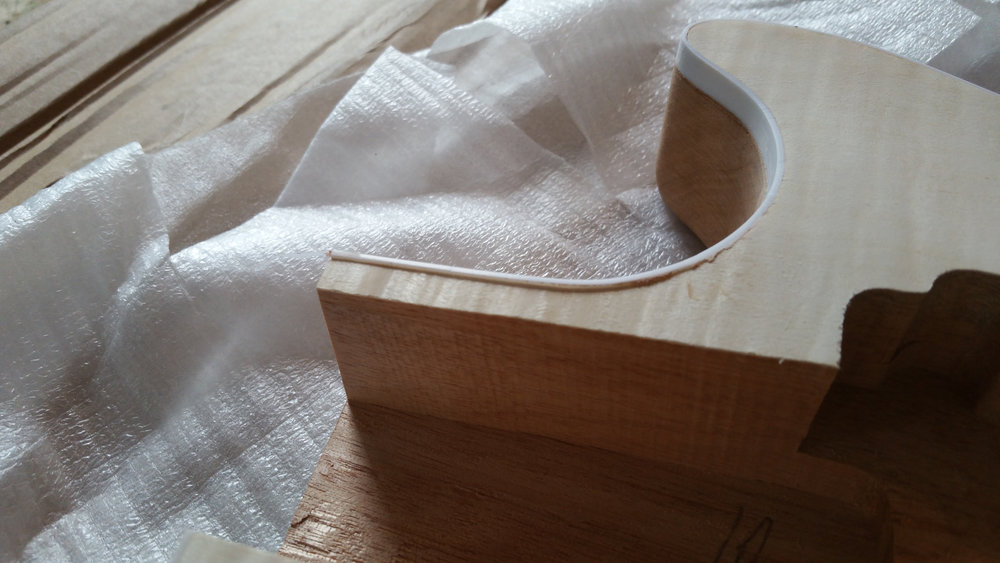
close
up detail of body as shipped
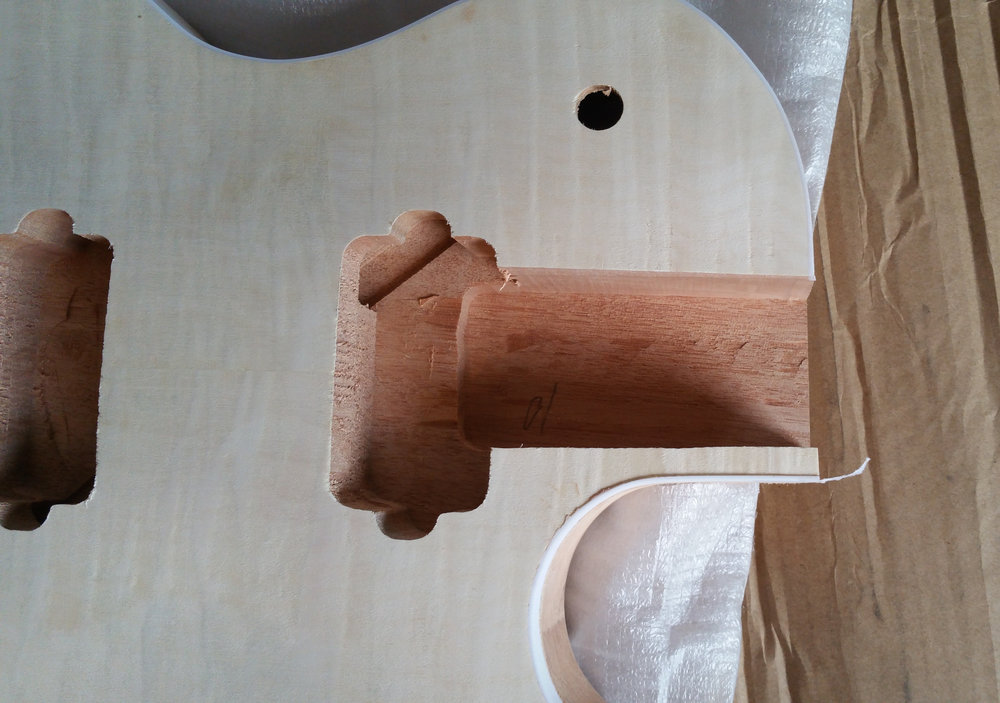
Single
ply plastic binding sticking up a bit by neck pocket. The
first thing I did to the kit after receiving
it was shave this down with a pocket knife.
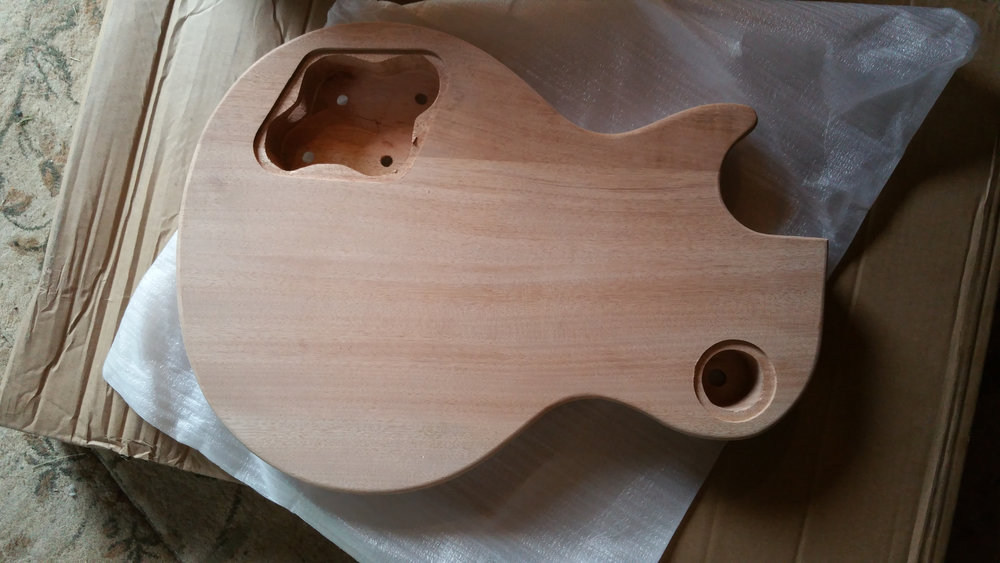
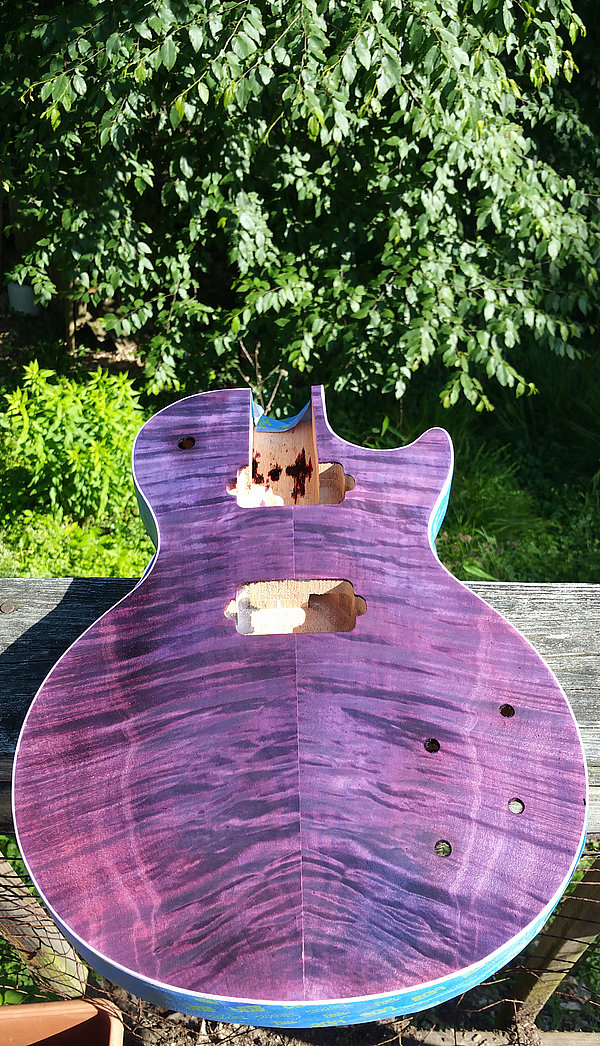
Rear
of body. Clearly
more than one piece, but I plan to finish the back and sides in a solid
color.
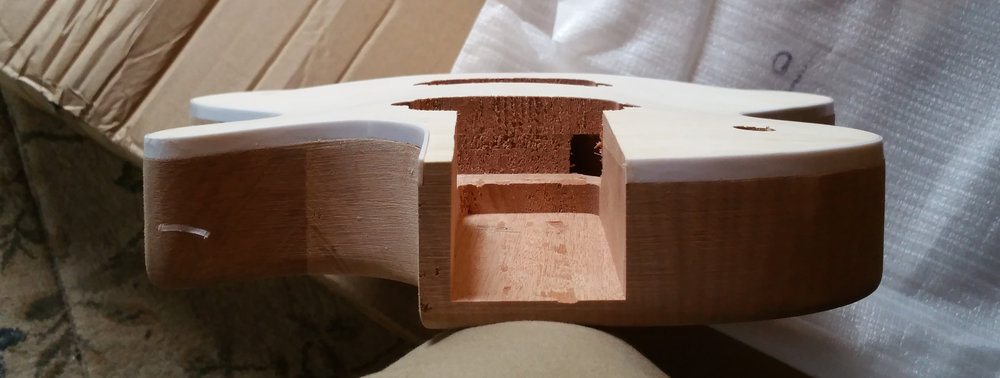
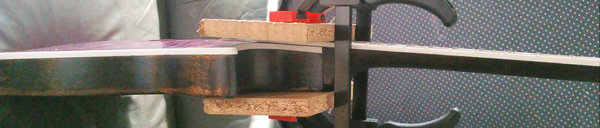
Note
the thickness of the veneer as evidenced by the mahogany of the body
extending
nearly to the surface. This is not a maple cap, but it wasn't
advertised as such, so I did not expect it. My immediate thought was
that I may have to
compensate for the sonic difference of having a guitar made almost
entirely of mahogany when
choosing pickups.
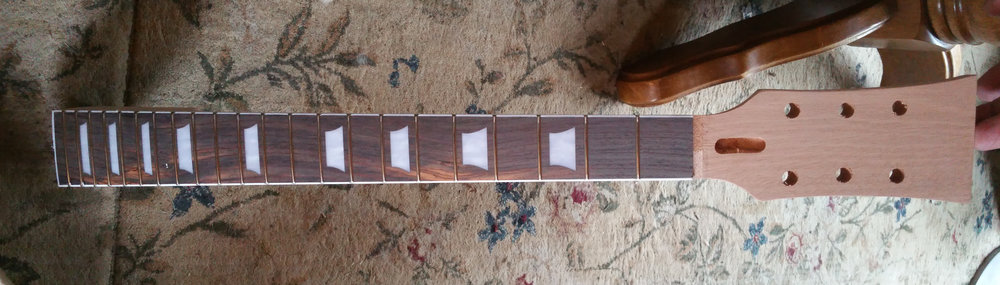
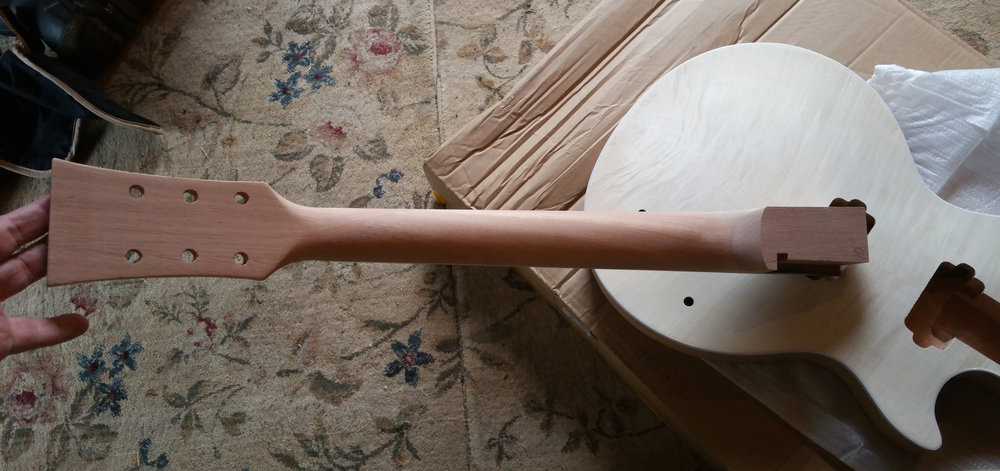
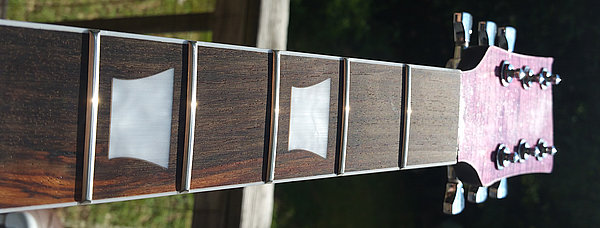
The
neck seems basically solid. The fretwork is not grossly out
of whack, but I will likely level, crown and polish before assembly,
anyway. I
like the interesting color variation on the fretboard.
I have not decided what to do with the
headstock just yet. I'm not trying toclone a LP, so I'm not
dead set on the open book design. I inherited a scroll saw myMom used
to use when she built
dollhouses, soI may Photoshop some design experiments.
Nut
Slot. I haven't test fit the supplied nut and may decide to
upgrade if things are going well.
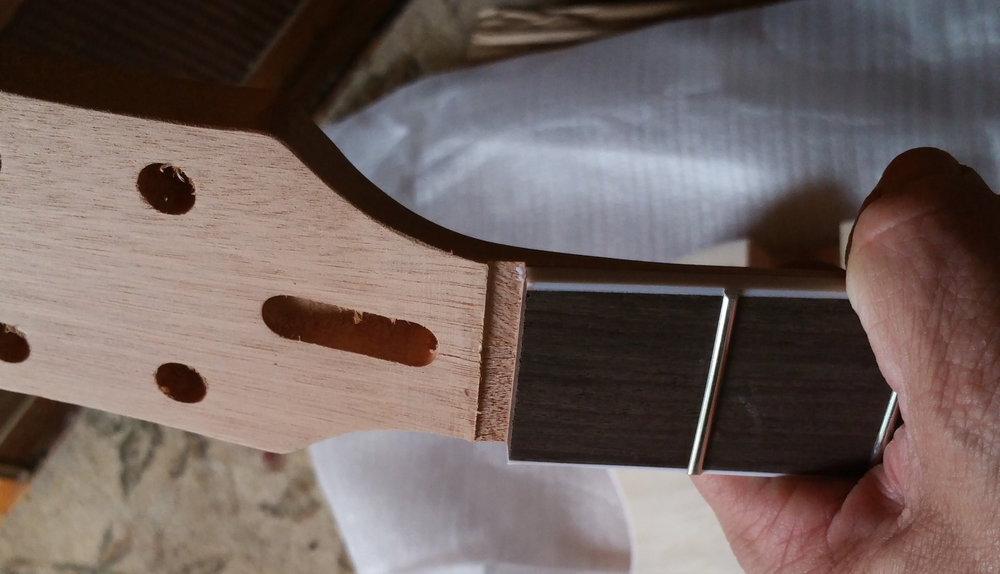
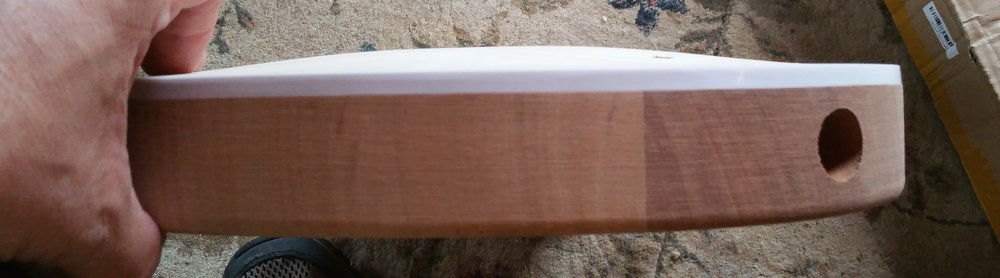
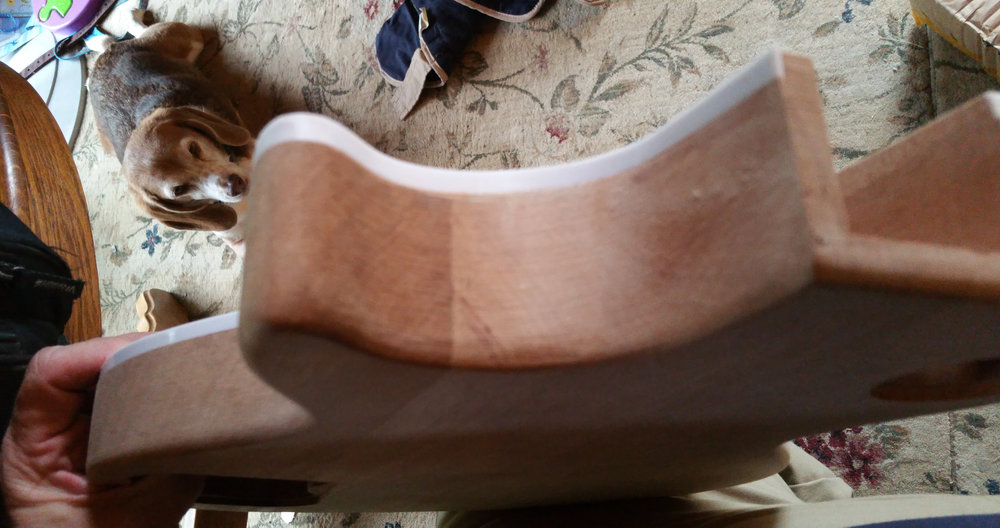
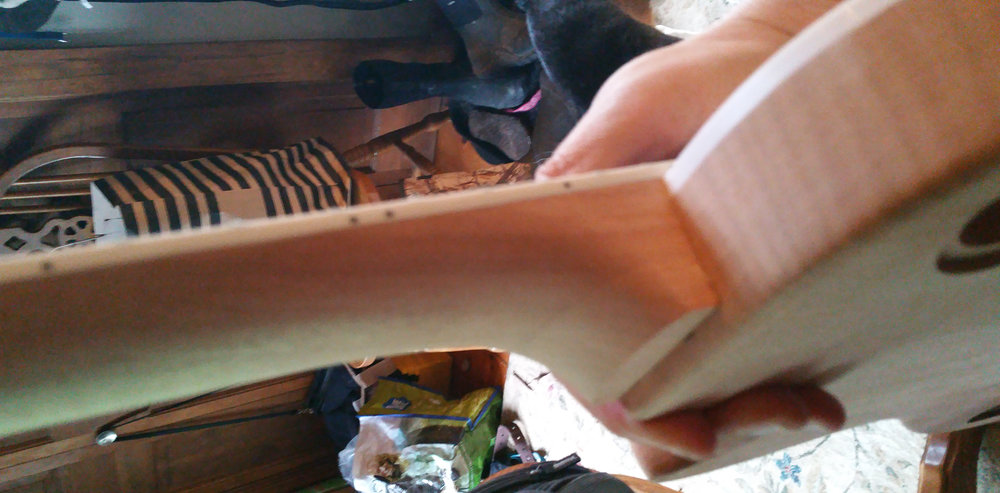
Neck
back. Interesting shape on the body end. What's the notch for?
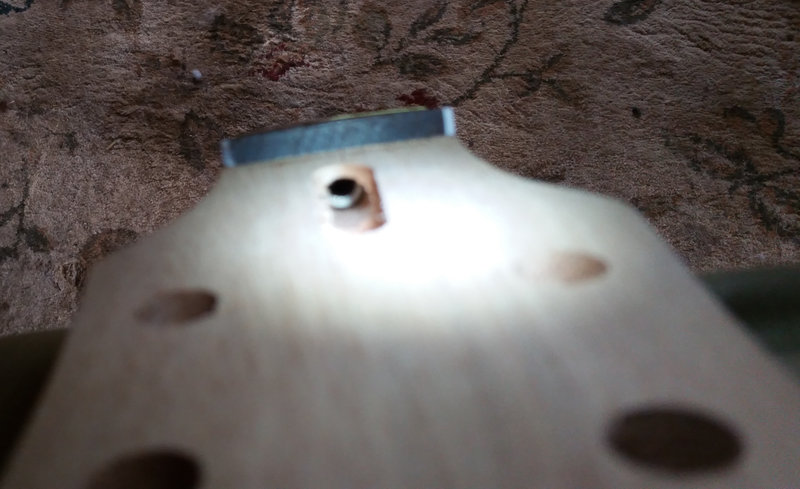
On
the Tomtop site there is some Q&A
debate about whether the neck
has a truss rod because none is shown in the picture.
(Psst...it's inside the
neck and you wouldn't see it, regardless...), but here to
allay those fears is a picture of the end
of a truss rod where it usually resides. I
have not tested it yet.
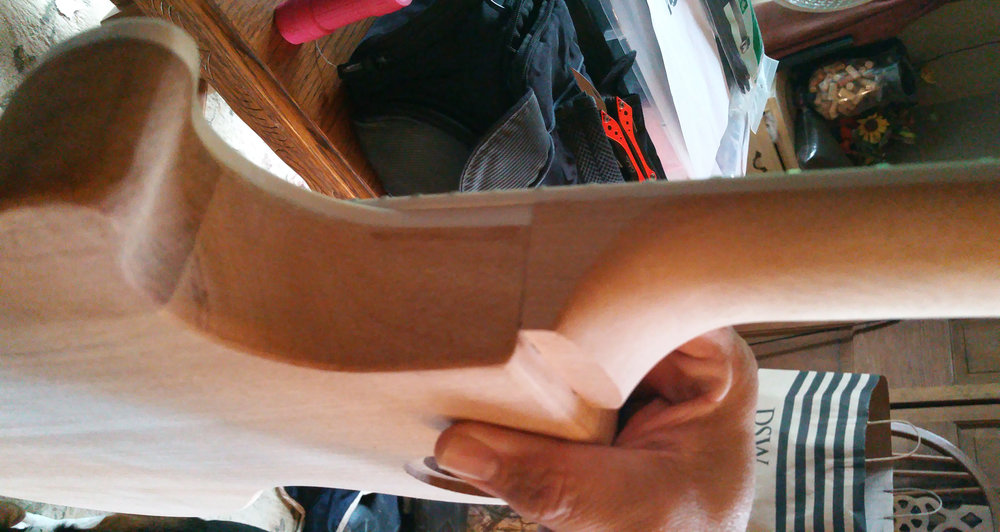
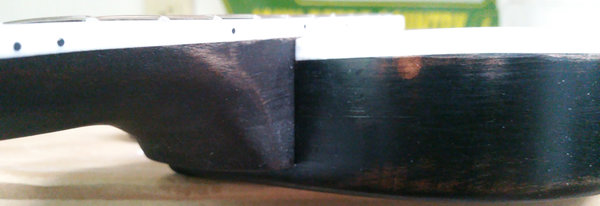
A
test fit of the neck to the body suggests the joint is pretty well
done. A very tiny gap here or there and no appreciable slop.
I did have to shave down the binding bit that stuck up next
to the neck pocket to get the neck to
set down flush, but nothing appears to be required for woodwork.
I still may sand down
any little rough patches and make sure there is as much physical mating
of
surfaces as possible for joint integrity.
It's
possible there are plenty of things about this kit that my eye
does not catch and which do not offend my sensibilities, but
are apparent or matter to
others. It only cost $77, so I don't expect top grade
quality. Neither will I agonize over flawless
perfection in my finished product. I care a lot more about
how a guitar feels and
sounds than how it looks. I'm in this for the cheap fun and
experience of the kit and will end up with one of
my favorite things in the world when I'm done: a guitar.
I have lots
of them. If this comes out nice, I'll make more.
If it comes out like crap, I'll make more and use what I've
learned along the way.
The Thinking Begins
I
have a plan in mind, but it's likely to change. Here's
what's in my imagination, sorta.
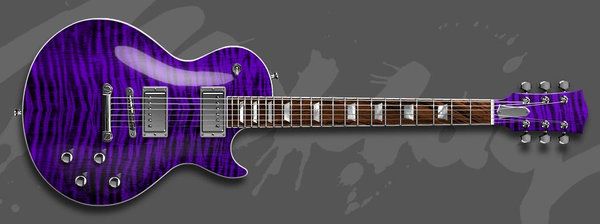
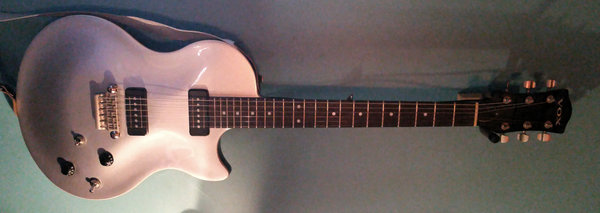
I
want purple flame over black and a 'mono"chrome"' hardware
look. I
used this really neat free SC Guitar Editor
to create this rendering.
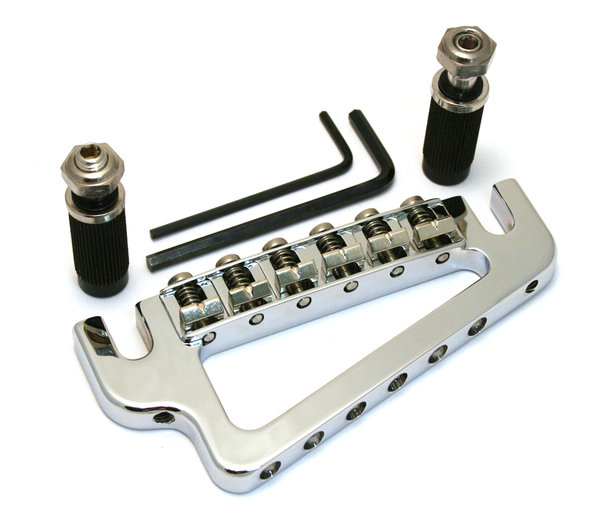
Since
I have to drill the holes for the bridge and tailpiece and they need to
be straight, that gave me an excuse to get one of these little
drill presses from Harbor
Freight. It was $67+tax.

I'm mindful
that the parts in the kit are pretty
low quality and might be odd dimensions. I'd rather start right
out with proper spec holes after deciding
on the upgrade parts, instead of drilling for the cheap stuff in the
kit and then wanting to upgrade later. I am toying with the idea of a Hipshot
Baby Grand bridge, which would
mean no tailpiece holes. I'm not sure about disturbing the visual
balance, though.
Some history of kit guitars and me.
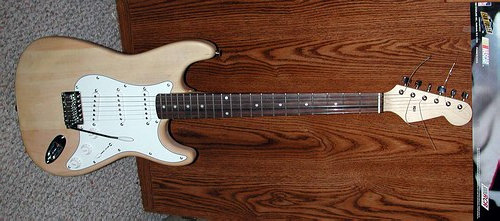
I
have some previous experience with guitar kits, but only of the
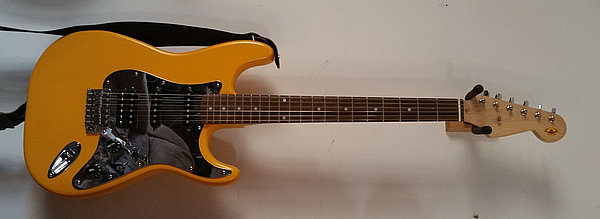
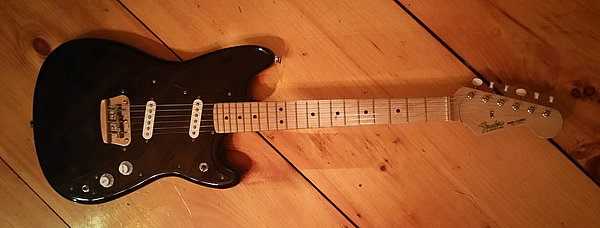
bolt-on variety. A Strat
style kit from Saga was put together in
less than an hour many years ago and made playable, though no
finishing was undertaken. Here's the result:
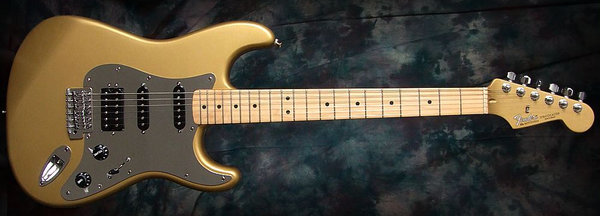
The
one I made cost half as much and came with a pre-cut headstock. Years
later, I took it apart again and upgraded with a
bunch of genuine Fender parts taken off a special edition "Gold Sister"
Strat, like this one.
I
tried my hand at producing a finish.
I chose
school bus yellow and did a terrible job of it.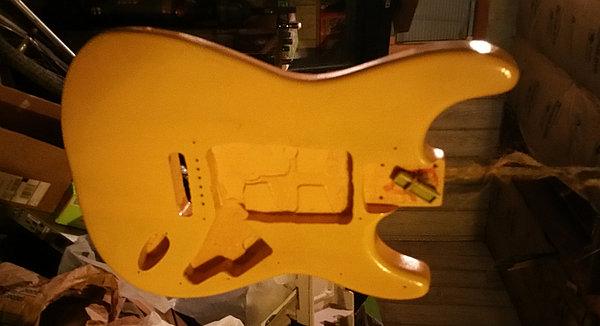
But
at least the guitar
sounds, looks and plays better than it used to, mainly by virtue of
acquired skill in setting up guitars than anything else.
As I acquire more experience in finishing, I may try to
salvage the yellow finish I applied. I've gathered much in
the way of fret and nut work along the way in the last year, as well.
This guitar will probably never be 'done.'
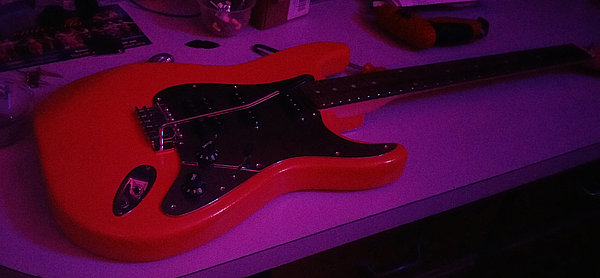
The
next guitar kit was more like pushing over the first domino than
anything else. It wasa Tele style, the vendor of which I do
not recall. The 'dominos' started with the fact that it came
with a paddle headstock and the neck pocket was cut wrong. I
am historically terrible at woodwork. I have neither
the tools nor the patience, nor the skill or experience, though I am
gradually acquiring all of these as I go. It's part of the
fun. In this case, I decided to grab a used Fender neck with
a maple fretboard off Ebay, so I could avoid butchering the headstock.
That still left me with a body with a bum neck pocket, so of course,
I decided to buy a Fender body from Ebay.
At
this
point
I had replaced the body and neck of a kit guitar where I already
expected to replace the hardware and electronics. Hmm. Ebay
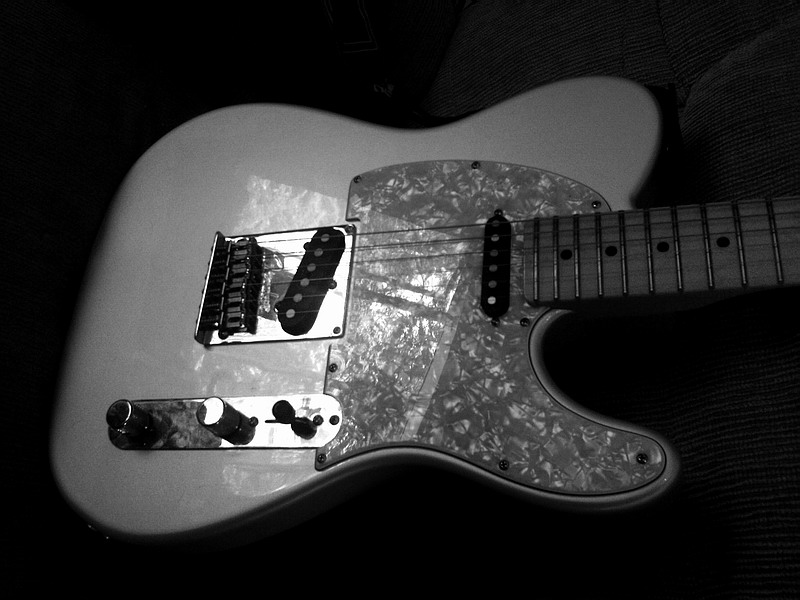
provided the complete
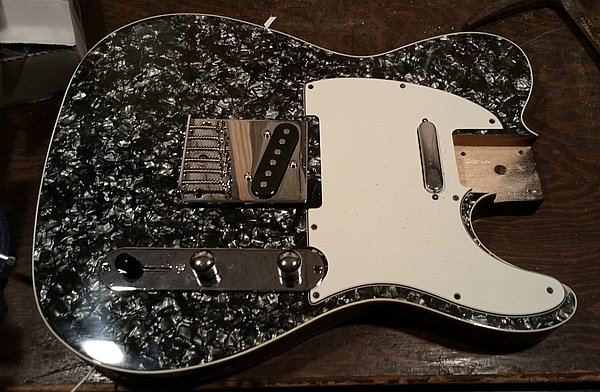
electronics/bridge from a Fender
Nashville Tele, I searched out a white Nashville Tele pickguard (which
Fender never offered) and ended up with the guitar shown here. Apart
from the pickguard, it is a
100% Fender Nashville Tele in a my favorite color combo, one Fender
never made.
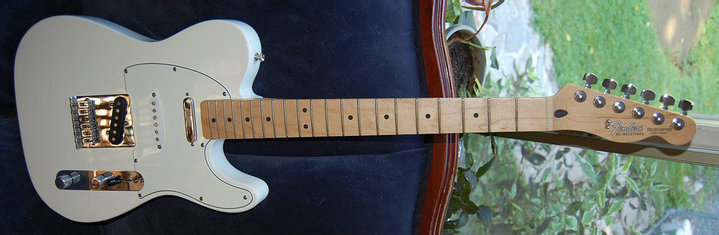
Once this was completed, I promptly bought a real
Fender Nashville Power Tele and
never played the Partscaster. This guitar is sinfully ugly, IMO.
I eventually traded the White Nashville Partscaster for
a nice Fender Duo-Sonic reissue and I don't play that either.
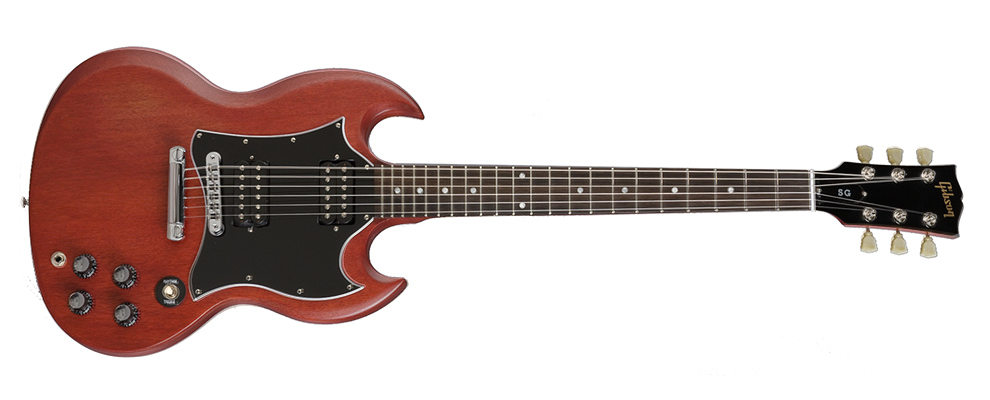
I traded the 'real' Nashville Tele for a White Schecter Tempest Custom,
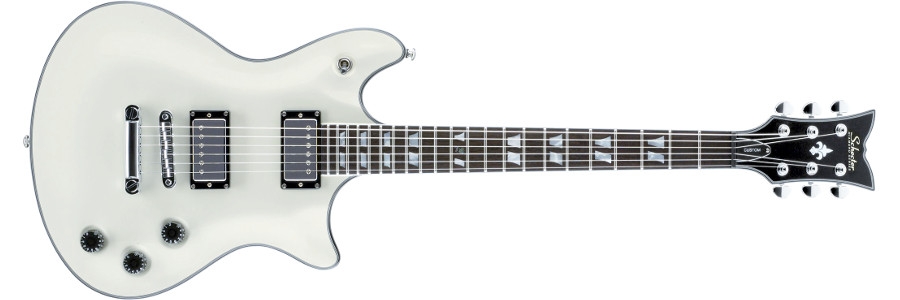
which I subsequently traded for a Gibson SG Special faded,
which I also never play.
Finally, to fill the Tele slot, I got a brand new
Fender American Std Tele in Blizzard Pearl, and hopped it up
with Rio
Gande Pickups, a MOTS pickguard and Mojotone
electronics.
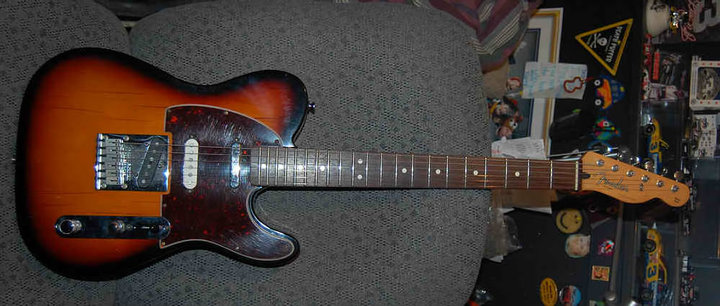
I still have a complete, unbuilt Tele kit from
which I think I've only used the strap buttons and a bunch of
other random Tele parts gathered up along the way,
including this snazzy GFS
body.
Gathering stuff
If I set out to research the 'best' way to go about this, it would never get done. I belong to a lot of groups on Facebook which contain info about kit guitars, guitar building and luthierie, guitar finishing, etc. If I've learned anything from perusing all this info, it's that there are nearly as many ways to do things as there are people doing them. Nearly all of them produce some really good looking result I'd be happy with. I had to just pick something and go with it.
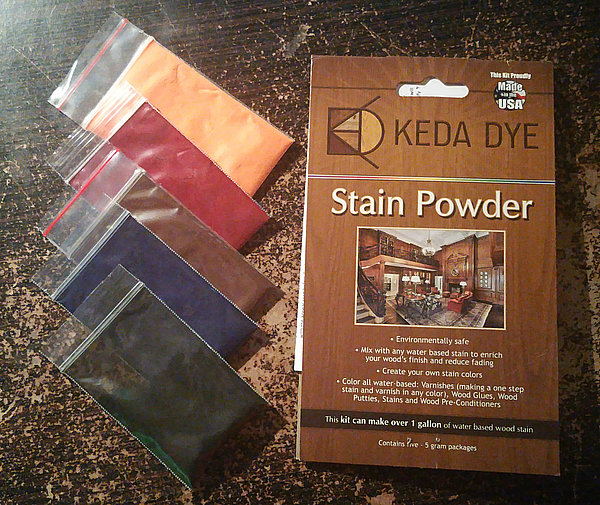
I decided to go with dye for the guitar top because of the flame figuring on the veneer. The word 'Keda' stuck in my head, so I decied to order this package. It was less than $20 and makes enough dye to do lots of guitars. I found some youtube vids of a guy using Keda dye who produced something very much like the purple I am hoping to end up with.
I
don't personally object to satin or faded finish guitars, I think I can
feel or hear the wood better without a thick finish, but for the top of
this guitar, I decided I
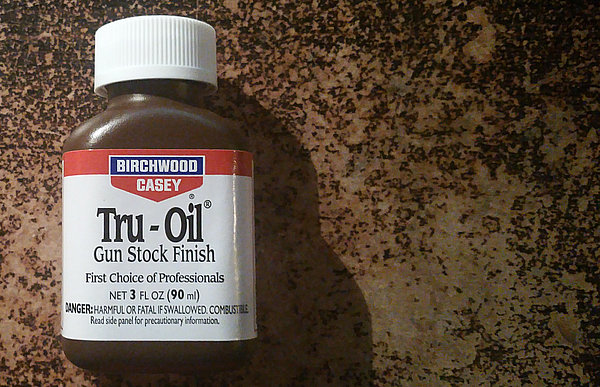
wanted a little bit of shine. More because I'd heard of it previously
and because the application
sounds a bit zen, I have decided to use Tru-Oil
after the dye. I
have no idea if this is enough to do the guitar top or if i am going to
want to do more than the top.I am currently thinking I will do the
sides and back and the neck in
dyed black without grain filling the mahogany and perhaps a coat or two
of this stuff will seal and
protect the otherwise untreated wood.
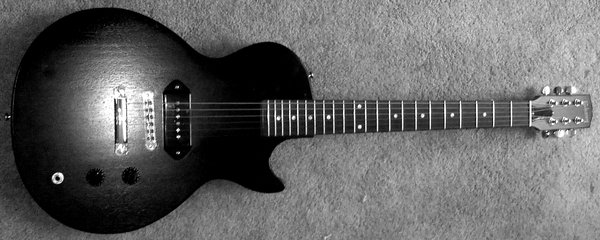
I
had a Gibson Melody Maker P90 (top) finished in black with
very open
mahogany grain and though I never connected with the guitar and
ultimately traded it for a Vox SSC-33 (bottom) that I immediately
bonded with, I
always liked the look and feel of the MM body and (although way too fat
for my taste) neck and the
immediate sense of the vibration in the wood. I hope to capture a
little of
that in this LP shaped kit guitar by keeping the grain open and lightly
finished on the back, sides and neck.
Because
I have zero experience with any of these materials and processes, and
because I am going to shoot for a pretty purple and black flame top
that requires a
little bit of technique to acheive, I thought it best to
experiment a little. To this
end, I bought a bunch of flamey maple veneer 'shorts' on Ebay.
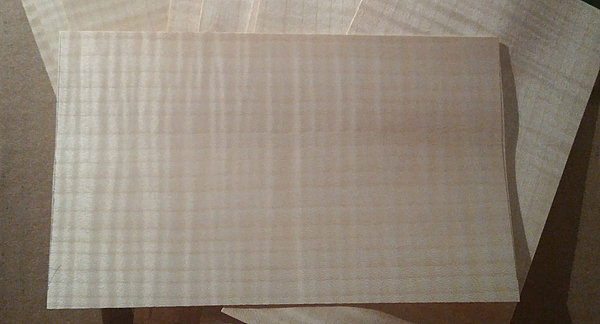
I
am generally a fan of matching headstocks, so I am toying with the idea
of gluing one of these veneers to the front of the headstock.
It's very flat
mahogany so I probably can't screw it up too bad.
Update!
I
finally (mostly) decided what to do and started doing it. I
started out by confirming that the included hardware
is not up to the standards I'd prefer. Here's what was in
the bag when I opened it.
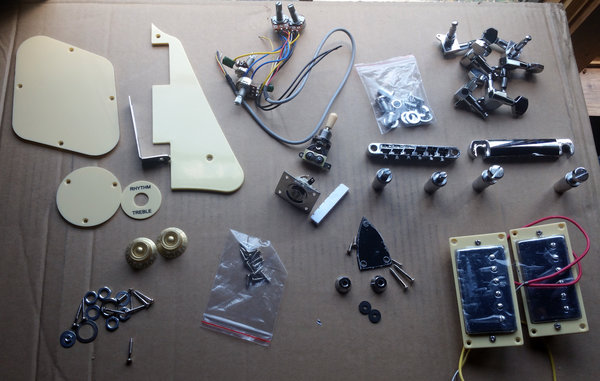
I
noticed there are only two knobs. I don't care because I
wasn't going to use the included knobs anyway, but someone looking for
a complete kit might be disappointed.
The plastics look basically OK, but not the color I want.
I may paint the rear cavity covers
and use them. The electronics are nicely pre-wired, but pots are tiny.
The
tuning heads are small and sloppy. The bridge and tailpiece look ok,
but the tolerances on the
bridge are loose. The plastic nut fits firmly into the slot, but looks
to be cut,
actually 'molded', a bit too high. No idea if the
two-wire humbucking pickups are any good, but I'd
replace them regardless. I wil probably replace the truss rod cover
with something custom and
engraved, too. Maybe not.
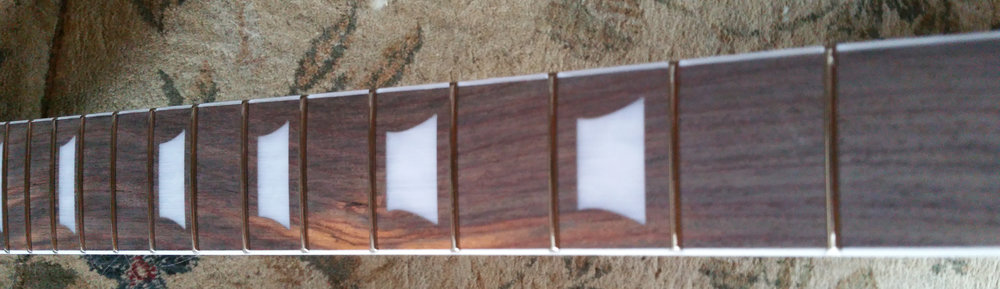
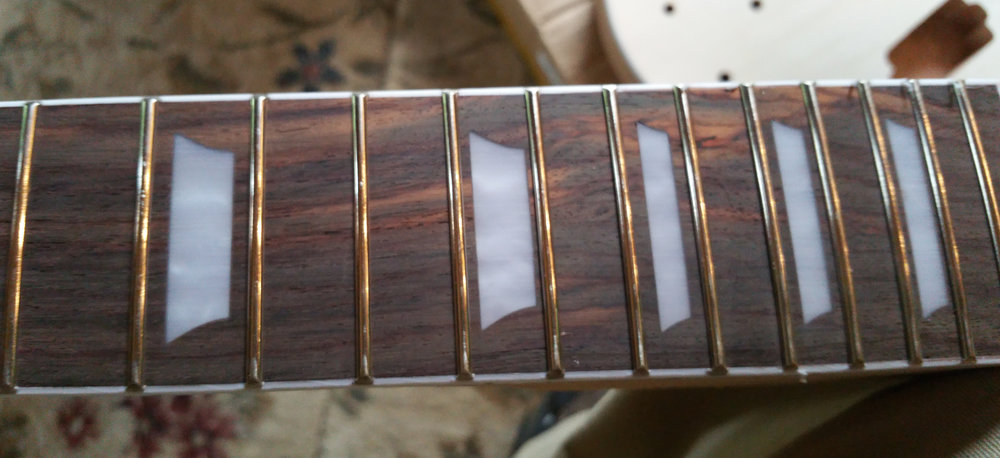
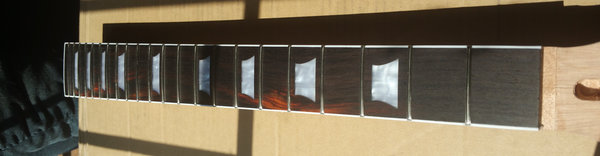
To
start, I levelled and crowned the frets. I didn't take a
picture during the process, but the color variation on
the neck looked nice after I oiled the dry-looking fretboard
with Fret Doctor, so I took a picture of that.
The
truss rod works and is dual action. That's fortunate, because
the neck had a back bowwhen
I went to flatten it out for the fret level. It was hard to
get the included allen wrench way
down the tunnel and into the nut. It got easier when
I did it a few times.
At
this point I went out and grabbed some more finishing supplies.
I had previously grabbed some oil-based Minwax
Wood Finish penetrating stain in Ebony for the back, sides and neck, so
I decided after much
reading to go with oil-based wipe-on Poly for those areas.
I'm sticking with the Tru-Oil on
top of dye for the top because I really want to see how that works.
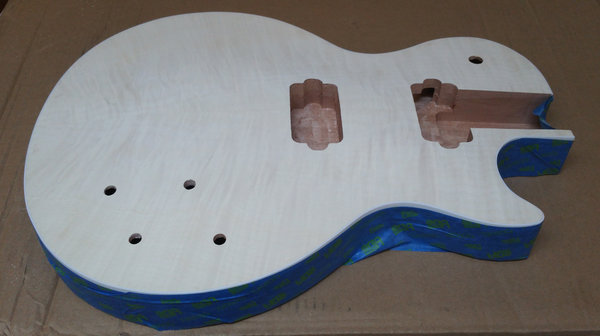
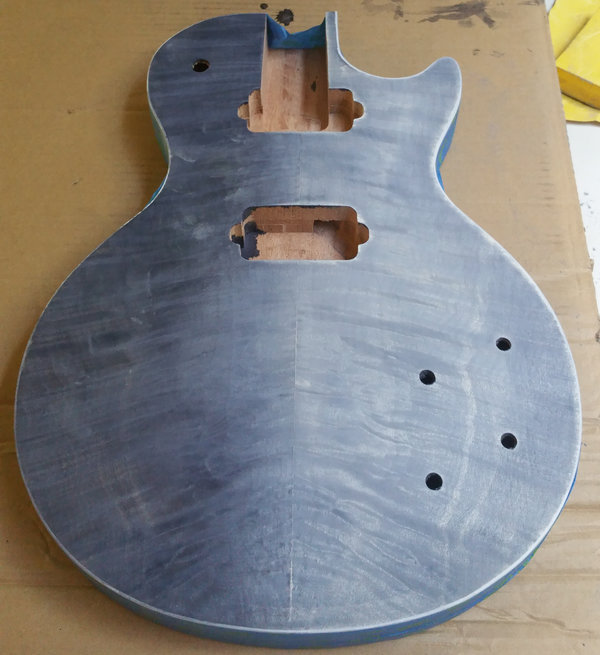
I
brought the body and neck to my extra house/guitar shop to start the
process. I
sanded the whole guitar with 220 grit sandpaper and taped off the sides.
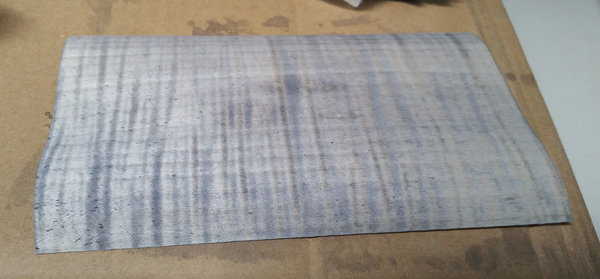
I
started by wiping some of the black Keda dye onto one of the little
veneers. I
decided I had not put enough dye powder into it and made it darker.
Here
is the veneer after the first, over-diluted application. I fixed the
mixture, waited for the dye to disolve and then went for it on the body.
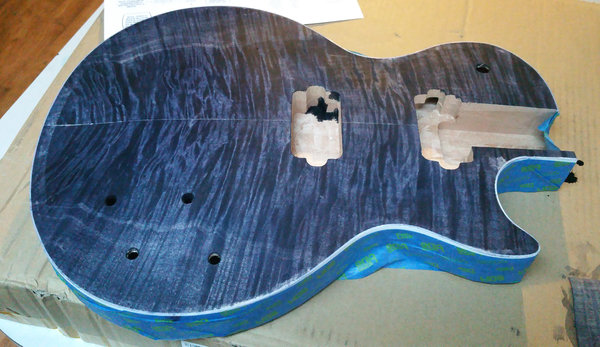

This process uncovered several places where the factory allowed glue or
something to seep into the top during the binding or joining the
veneers. There's a big
one near the cutaway. I may end up airbrushing black paint around the
edges to cover that up.
I have an airbrush and a compressor, but haven't used those skills in
so long it's fair to say I haven't done it. I was interested to see the
symmetrical figuring that runs
lengthwise, seemingly on top of the flame.
Overall, it's just gratifying to do this after watching 1000 other
people do it on Youtube. I ran out of time and left this to dry at this
point. I'll be
back today to sand back the grain.
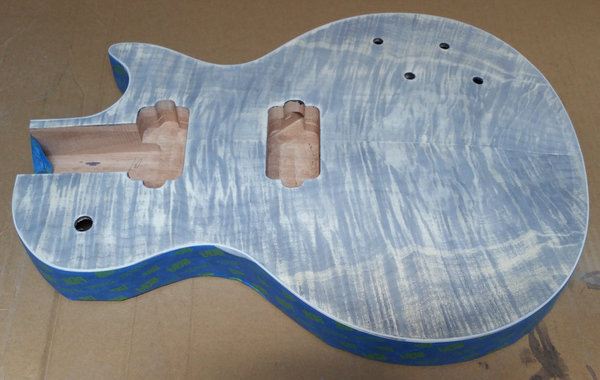
Getting Colorful
Over
the course of a couple days, I sanded down the black to reveal the
grain. It took a couple days because I'm paranoid about sanding through
the
super-thin veneer, so I initially didn't sand it enough. This is
halfway through
the first day.
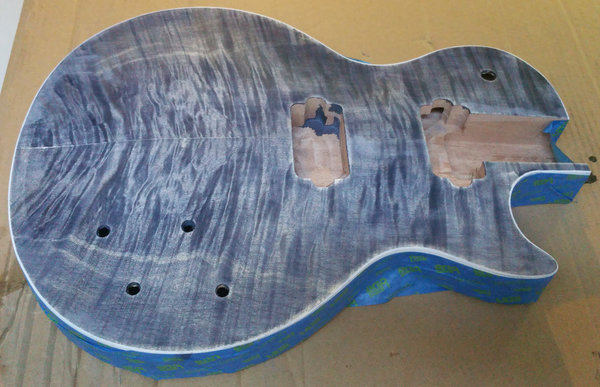
This
is after I finished and then quickly wiped the top with water to get a
better idea of what I had. I
let it be and decided to check again the next day, since it looked to
me as though the grain wasn't
really showing through so much as the flame was taking on different
shades of bluish grey. I
don't find that particularly unappealing, but I want to stick with the
whole purple idea and
I was concerned that there wasn't going to be any unstained wood that
would ultimately end
up a lighter purple.
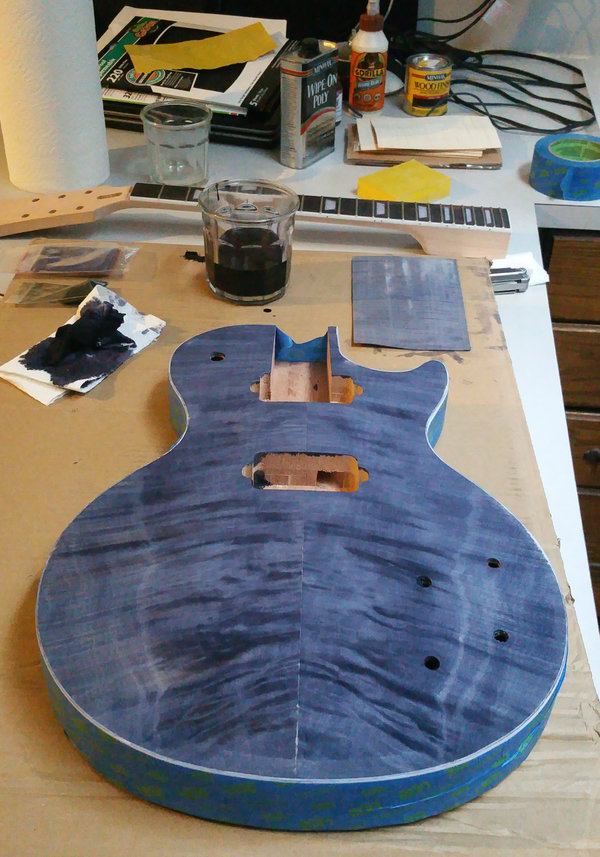
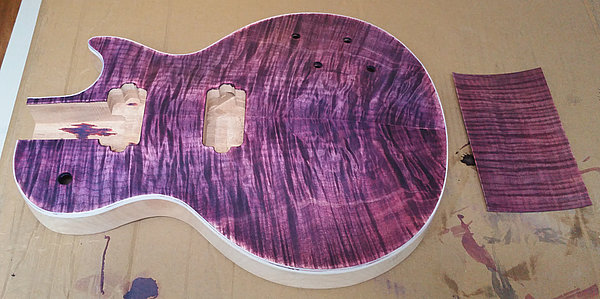
When
I went back the next day, I loaded up a little hand sander with some
180 grit
and
really took to it. I didn't sand through anywhere and I think
this is the desired effect. I
dusted it off real good and mixed up some purple. I went
pretty much 1/8 tsp of blue,1/4 tsp of red and
a very light sprinkle of brown into 8 oz of really hot water.
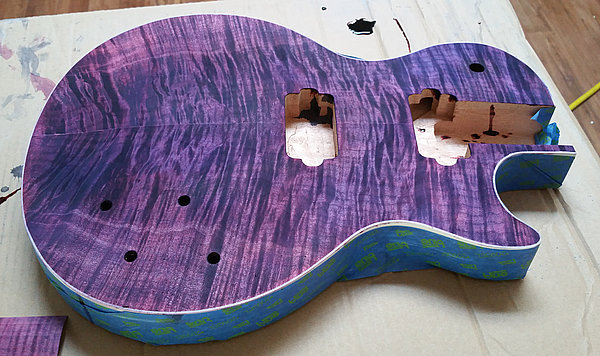
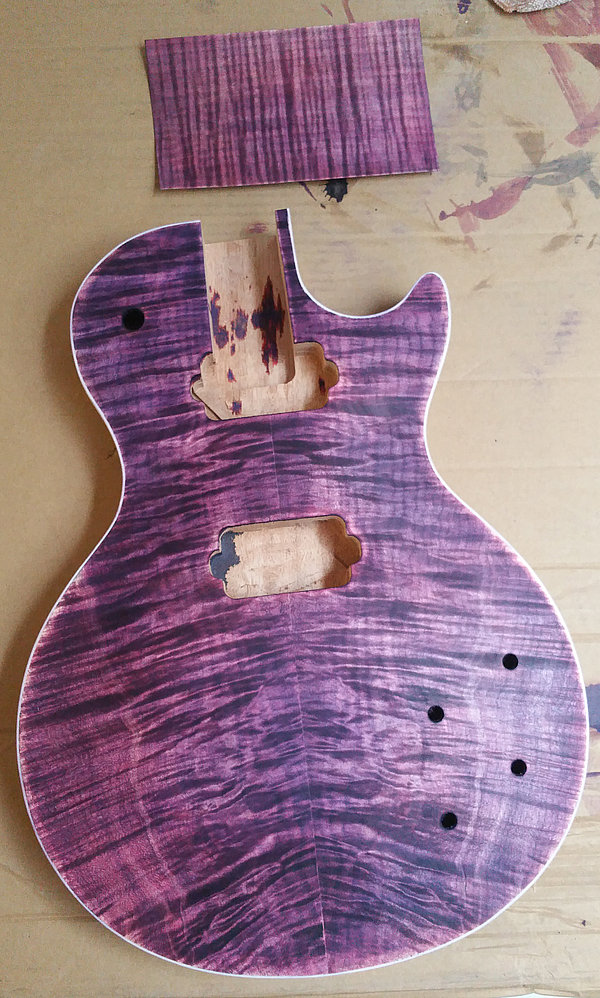
I
just went ahead and splotched it on there. You can see just
above and to the left of
the
holes where i plopped the sopping dye-rag onto the top. It soaked up a
lot of dye real fast. Next
time I do this on a another guitar I am going to wet the top
and be more patient about applying the color.
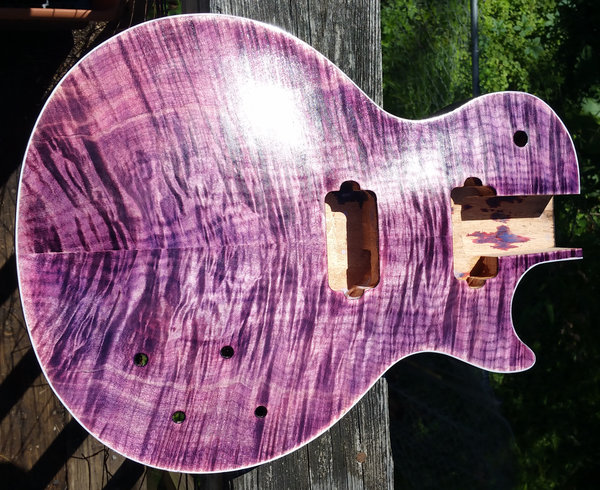
I
took the guitar out in the sun just after applying the dye, with the
intention of getting a well-lit picture
of the color. The dye was drying very quickly as I took this
picture. You can see around
the pickup selector hole to the upper left where it's dark and wet,
surrounded
by drying color. The drying evened out the color a lot.
I left it alone at
this point and came back the next day to see what I had.

I
was slightly underwhelmed by what I found, though many online sources
had warned that it
doesn't look like the final product when it's in process, especially
before a clear topcoat. Prior
to this photo, I had lightly sanded with 220, 320 and then
400. I didn't know what
elese I could do to make the flame more prominent, so I just decided to
go ahead and
start with the Tru-Oil.
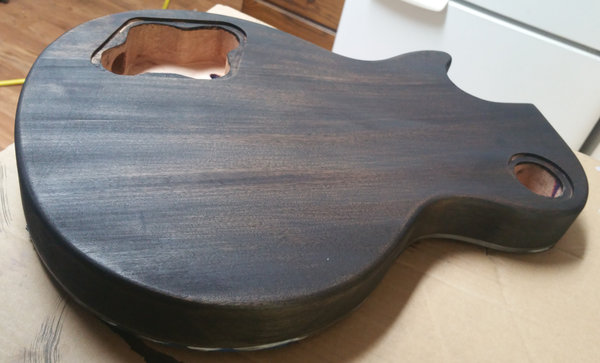
This
is after the first application of Tru-Oil, which promptly disappeared
into the wood as though I
had never applied it. I expected this, since I had
not used any sort of sealer.
At
this point I am going to have to say that I am pretty pleased with this!
Many
more coats of Tru-Oil will be applied, plus the back, sides and neck
need color. I settled in for many days of applying coats of
Tru-Oil and decied to start gathering up some of the hardware for the
guitar.
Hardware selection begins
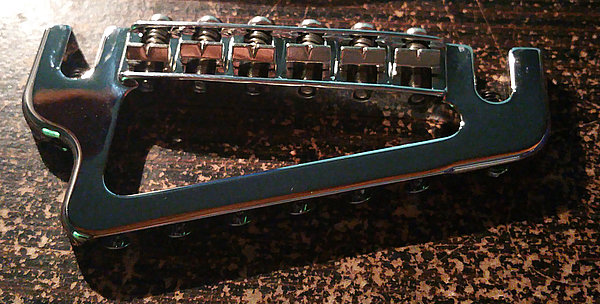
I
went with the Hipshot Baby Grand, pictured earlier. These
have always intrigued me, though I have never seen one in person.
This guitar is as good a reason as any!
 I went
with open-back Hipshot
locking tuners, which was never in question. I like Hipshot
hardware and have the tuners on a couple other guitars. I
could
not resist dropping them in for a test fit. My model car
building
days must be coming back to me.
I went
with open-back Hipshot
locking tuners, which was never in question. I like Hipshot
hardware and have the tuners on a couple other guitars. I
could
not resist dropping them in for a test fit. My model car
building
days must be coming back to me.
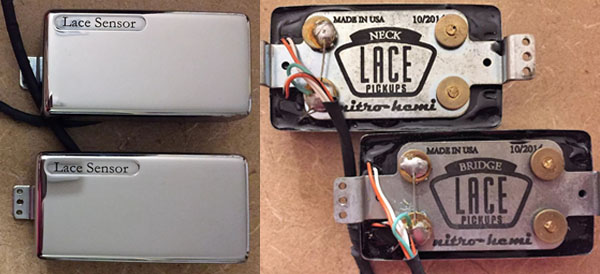
One of the
most
important parts of the guitar is obviously the pickups. I
decided to try something new which also enhances
the monoChrome look and got a pair of Lace Nitro-Hemi
humbuckers with
closed chrome covers.
I'm
keeping with the monoChrome look for hardware as much as
possible.
The bridge, tuners and strap buttons are chrome,
which is
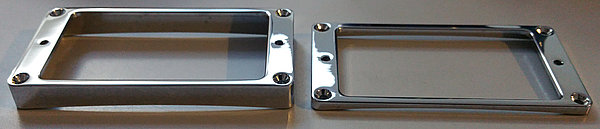
not unusual. I've gone the extra step to replace some things
that
are usually colored plastic with chrome metal or plastic. I
scored nice WD Music plated metal humbucker mounting rings
This
is key to the monoChrome look, IMO.
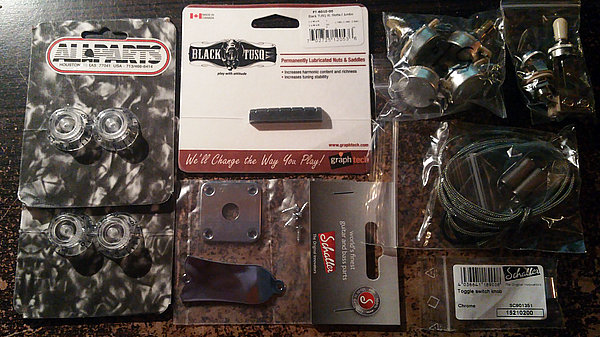
I
found a plated truss rod cover. I am contemplating having
it engraved with something. Schaller
supplied a chrome jackplate and swich tip. So
far I have not found satisfactory chrome knobs. In the
meantime,
I have clear top hat knobs from Allparts to let the top color shine
through. Along with this stuff, I sprang for a
black TUSQ
XL nut from Graphtech. The Art of Tone electronics
are also
pictured,525K/5%CTS Pots/Switchcraft toggle and jack/Russian Military
surplus PIO caps, blah blah blah.
I
tracked down a plated toggle switch washer. That was harder
than
I expected. And it's taking the slow boat from China.
Literally. I think it's the last bit of hardware
I'm
waiting on. No hurry, since I still have much to do before
adding
hardware.
For
a week or more I have been daily applying thin coats of TruOil to
the top. It was starting to take on a little gloss,
which made the grain on the top really apparent. I'd read
that
one should sand with high grit after every few coats of TruOil and
decided to give that a shot. I'd also read about wet
sanding and creating a sort of slurry to fill the grain a little, so I
took some waterproof 400 grit paper to the top. I didn't take
any
pictures of that, but it created a dull, hazy film over the pretty top
after I wiped it off. It also dyed my hands pink, as it
obviously
pulled some of the finish off through the TruOil. Or maybe
the
finish had seeped into the TruOil, I dunno. I hope it looks
good
again when I get around to slopping more TruOil on the top.
But
in the meantime, I covered the entire top with blue
tape and decided to start the process of staining the back black.
I sanded with 180, then 220, as the Minwax can recommended.
This
is following the first application, letting it dry and then wiping off
what little excess there was. I almost like the mahogany
grain
showing through the Ebony stain, but not enough to leave it that way.
I did, however, leave the body alone at this point and
returned
the next day to apply another coat of black. 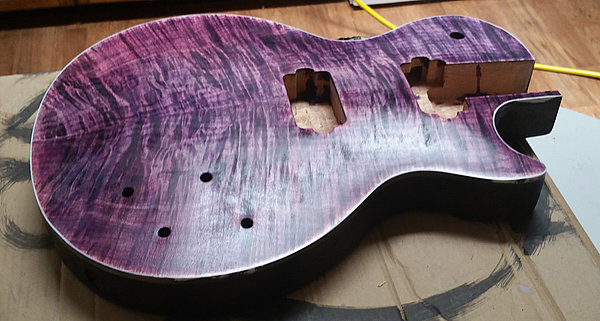
After
the second coat of black and letting it dry, the next day my curiousity
got the better of me. I wondered if my wet sanding
experiment had ruined the top. I wondered if my masking job
worked and the black stayed off the top. I wondered how the
nice
top would look with the black sides. The top looked awful
when I
removed the masking tape. Hazy, faded and
dingy. The
masking tape had allowed a little bit of black to creep onto
the
top on the edges here and there, but I used some 400 grit sandpaper and
carefully got it off. I anxiously put another coat of TruOil
down
and the color popped back up through the haze. Whew!
The
color looks great against the black! It should look nicer
when I
finally scrape the white binding to create the sharp contrast line.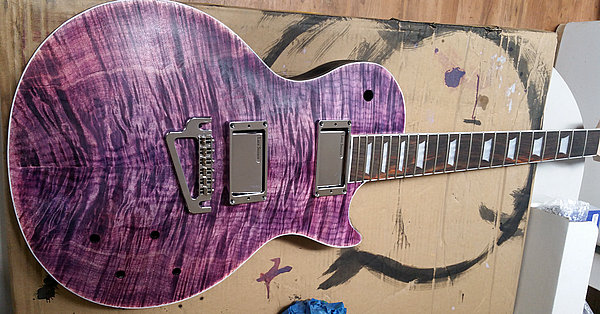
I'd
not had the neck, hardware and body in the same place since I applied
the color, so I brought the neck and hardware to the shop to do a sneak
preview. Now I'm getting impatient. I look at this
and it
makes me want to grab it and play! I need to nail down a
headstock design and do the woodwork so I can start with the black on
the neck. I also need to figure out how best to do
the veneer. Hmm.
The
next day, I applied another coat of TruOil, the second one after the
wet sanding experiment. It appears that process smoothed out the top.
With only this second coat (probably about the 8th or 9th
overall), it is decidedly taking on a shine. I took a pic
inside and decided to take it out in the sun for a sort of shine and
color view.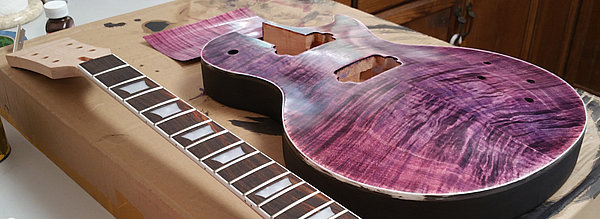
I'd
been toying with thinking about echoing the curve of the hipshot bridge
in the headstock design. After these shots, I grabbed a pencil
and the bridge and traced out my idea.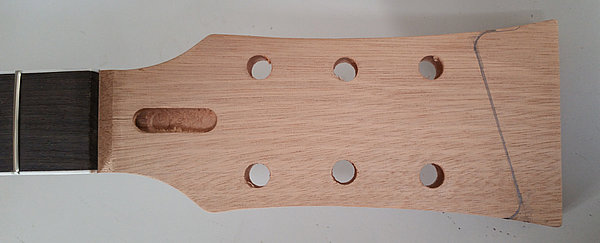 It
was only after looking at this line that I realized it is a bit like
half of a Gibson open book headstock shape! I didn't have time to
attack it with the scroll saw, I just took a picture to take home and
contemplate before committing to it. I cranked up Photoshop and
overlaid a picture of my headstock veneer and a picture of the truss
rod cover to see how it might look. Here's the result.
It
was only after looking at this line that I realized it is a bit like
half of a Gibson open book headstock shape! I didn't have time to
attack it with the scroll saw, I just took a picture to take home and
contemplate before committing to it. I cranked up Photoshop and
overlaid a picture of my headstock veneer and a picture of the truss
rod cover to see how it might look. Here's the result.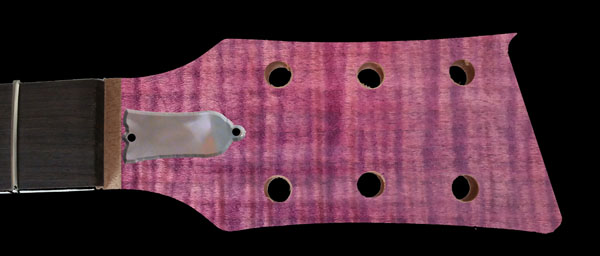 Here's
the result in real ife. The next day, during my stop at the
shop to apply more TruOil, I decided to just switch on the
scroll saw and go for it. Knowing me, I have to avoid
overthinking and just 'do it' or it don't get done.
Here's
the result in real ife. The next day, during my stop at the
shop to apply more TruOil, I decided to just switch on the
scroll saw and go for it. Knowing me, I have to avoid
overthinking and just 'do it' or it don't get done.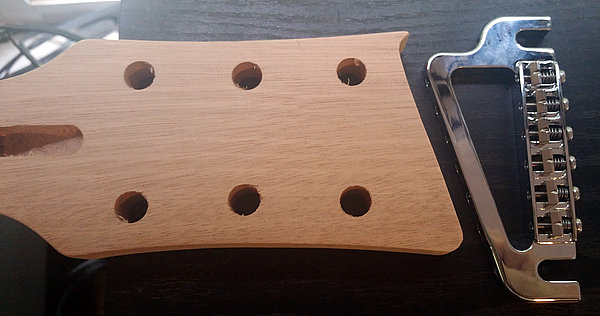 I
placed the Hipshot Baby Grand bridge next to the post-cut headstock for
this pic to show where my design thinking came from. These shapes
will hopefully visually echo one another along the length of the
strings when it's all put together. I think the next step is
going to be applying some color to the neck. We'll see!
I
placed the Hipshot Baby Grand bridge next to the post-cut headstock for
this pic to show where my design thinking came from. These shapes
will hopefully visually echo one another along the length of the
strings when it's all put together. I think the next step is
going to be applying some color to the neck. We'll see!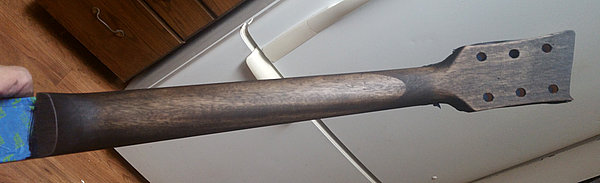 I
correctly predicted my own actions. Not hard. Here's the
neck after the first coat of Minwax ebony stain. I ended up
applying two coats on two consecutive days.
I
correctly predicted my own actions. Not hard. Here's the
neck after the first coat of Minwax ebony stain. I ended up
applying two coats on two consecutive days.
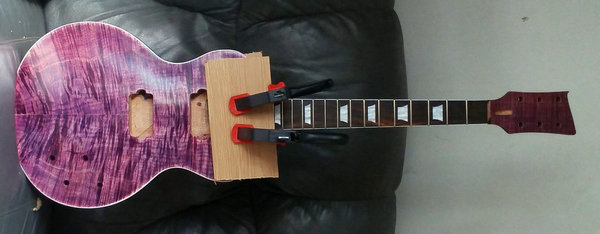
The
next step, taken a day later - and after consulting the nice people on
Facebook's Amateur Luthier group, was to sandwich the headstock and
veneer between two pieces of flat "wood" and wax paper.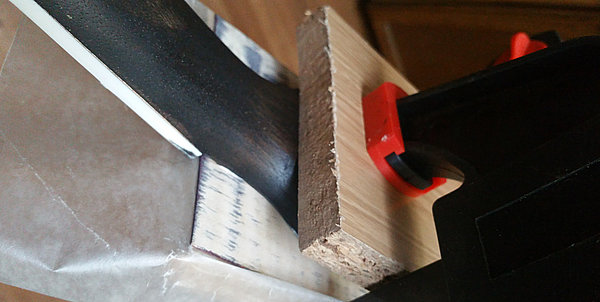 I
guess I will find out how that works when I take off the clamps
tomorrow. The next step after that will be to trim the veneer
around the headstock shape. I have some suggestions about
how to deal with the edges, but I'll need to see how it looks, first.
Here's how I left it.
I
guess I will find out how that works when I take off the clamps
tomorrow. The next step after that will be to trim the veneer
around the headstock shape. I have some suggestions about
how to deal with the edges, but I'll need to see how it looks, first.
Here's how I left it.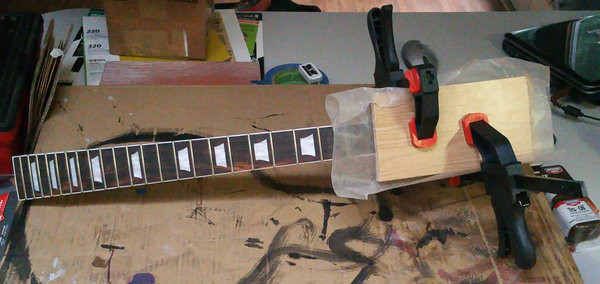 Things
are moving along. I will likely put on more TruOil on the top,
but it's workable as it stands. I'm up to three coats of Minwax
wipe-on Poly on the back and sides. I sanded with a 320 sanding
sponge after the first coat dried for a day amd sanded with 400 grit
sandpaper after the second coat had dried. Here's the result so
far.
Things
are moving along. I will likely put on more TruOil on the top,
but it's workable as it stands. I'm up to three coats of Minwax
wipe-on Poly on the back and sides. I sanded with a 320 sanding
sponge after the first coat dried for a day amd sanded with 400 grit
sandpaper after the second coat had dried. Here's the result so
far.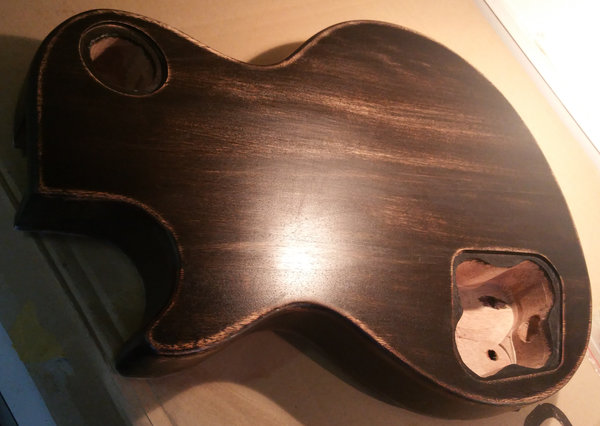 I
was not going to leave this much grain showing through the back
and sides and had not planned on this worn sort of look, but the more I
worked on it, the more I began to like it. The edges of the top
have ended up looking kind of worn, so it all fits together.
I
was not going to leave this much grain showing through the back
and sides and had not planned on this worn sort of look, but the more I
worked on it, the more I began to like it. The edges of the top
have ended up looking kind of worn, so it all fits together.
The Big Day
The
stars aligned and I had a good block of time to dedicate to the project
today. I had skipped a day, so I was anxious to find out how
gluing the veneerto the headstock went. 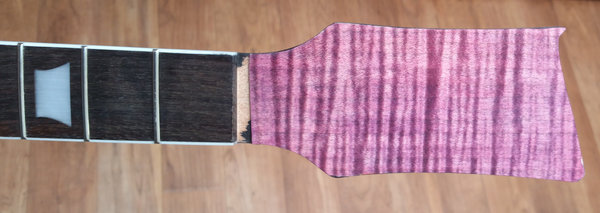 It
seemed good, so I trimmed around the edges with an X-acto knife.
I didn't screw up too badly. I sanded teh edges down flush
with a sanding sponge and 120 grit, followed by a 320 sponge. It
took a lot of the finish off the sides of teh headstock, so I am going
to end up touching that up before I start applying any clear.
It
seemed good, so I trimmed around the edges with an X-acto knife.
I didn't screw up too badly. I sanded teh edges down flush
with a sanding sponge and 120 grit, followed by a 320 sponge. It
took a lot of the finish off the sides of teh headstock, so I am going
to end up touching that up before I start applying any clear.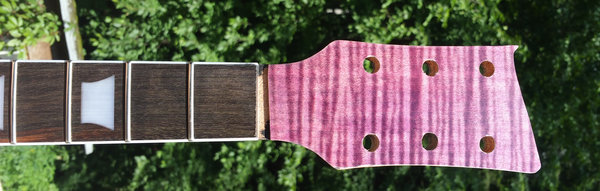 I used the X-acto
and cut out the holes for the tuners. I filed them smooth with a
pencil wrapped in sandpaper. I couldn't resist seeing how the
nice, chrome tuners looked in the headstock
I used the X-acto
and cut out the holes for the tuners. I filed them smooth with a
pencil wrapped in sandpaper. I couldn't resist seeing how the
nice, chrome tuners looked in the headstock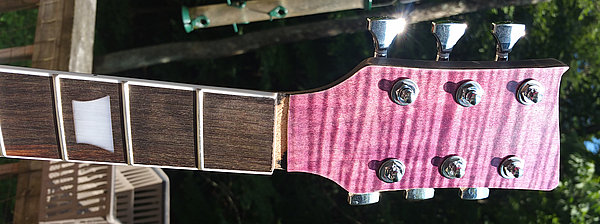
 My,
what nice, polished frets you have! :) Of course I could
not resist slapping this assembly onto the body for a further sneak
preview.
My,
what nice, polished frets you have! :) Of course I could
not resist slapping this assembly onto the body for a further sneak
preview.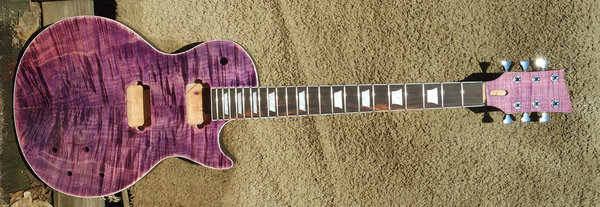 I
think I'm really stalling because I'm apprehensive about drilling the
bridge holes. I sat down and started wondering what I should do
next. I decided to scrape the binding. That took a couple hours.
Once that was done, I just decided to glue the neck and body
together since there wasn't a whole lot of reason not to and I had
promised myself I would do it by the end of the weekend.
I
think I'm really stalling because I'm apprehensive about drilling the
bridge holes. I sat down and started wondering what I should do
next. I decided to scrape the binding. That took a couple hours.
Once that was done, I just decided to glue the neck and body
together since there wasn't a whole lot of reason not to and I had
promised myself I would do it by the end of the weekend.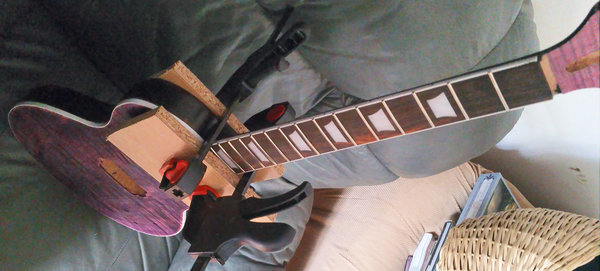
 Compared
to recent weeks, progress on the guitar has slowed to a crawl after
attaching the neck. Partly due to other things using up the time,
but also because the next step is drilling the holes for the
bridge/tailpiece and I need to get the correct drill bit to make that
happen correctly. 7/16" pointy tip is what's required.
Compared
to recent weeks, progress on the guitar has slowed to a crawl after
attaching the neck. Partly due to other things using up the time,
but also because the next step is drilling the holes for the
bridge/tailpiece and I need to get the correct drill bit to make that
happen correctly. 7/16" pointy tip is what's required.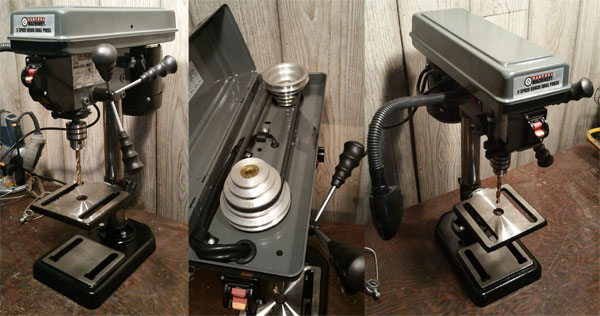 In the meantime, I assembled my new, cheapo drill press.
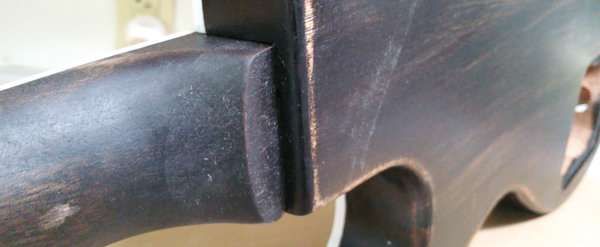
Here's
what the neck joint looks like, prior to more sanding and staining,
etc. Seems pretty solid. My affection for the worn look on
the back and sides grows more every time I look at it, but test fitting
the mirror cavity covers I got points out the incongruous look.
The chrome stuff looks great on the top and I thought the mirror
would carry the theme, but it just looks bizarre back there. I
may go with plain black instead. I was surprised to find
the covers fit in the holes without modification.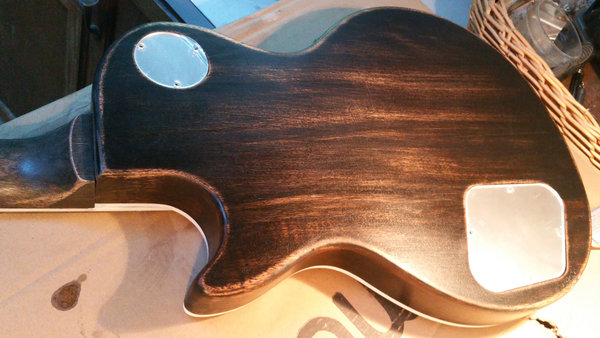 The
worn appearance with a slight gloss on the back is very apparent in
this image. I have to say I really like this! I like a
connected, organic feel to the neck and body of a guitar, rather than
all glossy and finished. This does it visually, at least.
The
worn appearance with a slight gloss on the back is very apparent in
this image. I have to say I really like this! I like a
connected, organic feel to the neck and body of a guitar, rather than
all glossy and finished. This does it visually, at least. 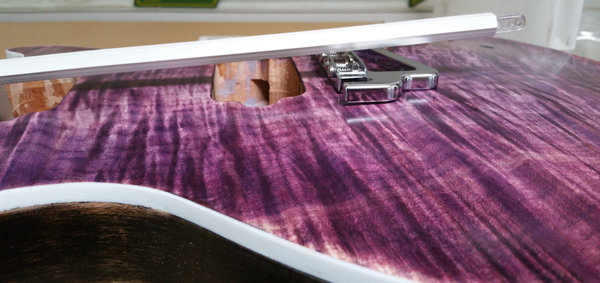 One
thing I was concerned about was the neck angle. Using an ad hoc
straight edge that doubles as the thing used to change the angle of
mini-blinds (because that's all I could find on short notice), I
quickly scoped out the angle. It looks just right.
That's one speedbump of dread passed over. Whew!
One
thing I was concerned about was the neck angle. Using an ad hoc
straight edge that doubles as the thing used to change the angle of
mini-blinds (because that's all I could find on short notice), I
quickly scoped out the angle. It looks just right.
That's one speedbump of dread passed over. Whew!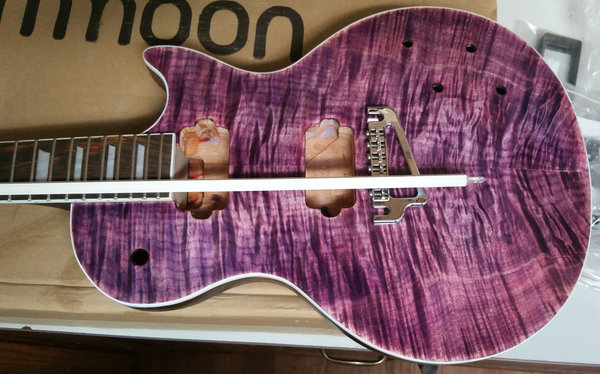 I
also did a quick measurement off the scale of the guitar to see where
the final bridge placement will likely end up. Looks pretty good
to me! I'm going to do some measurements of the nut width and
string spacing and other esoterica to make sure my combo of mega-cheap
Chinese kit and high quality US spec replacement parts will work
together. I already know I have to enlarge the holes for the pots
and switch.
I
also did a quick measurement off the scale of the guitar to see where
the final bridge placement will likely end up. Looks pretty good
to me! I'm going to do some measurements of the nut width and
string spacing and other esoterica to make sure my combo of mega-cheap
Chinese kit and high quality US spec replacement parts will work
together. I already know I have to enlarge the holes for the pots
and switch.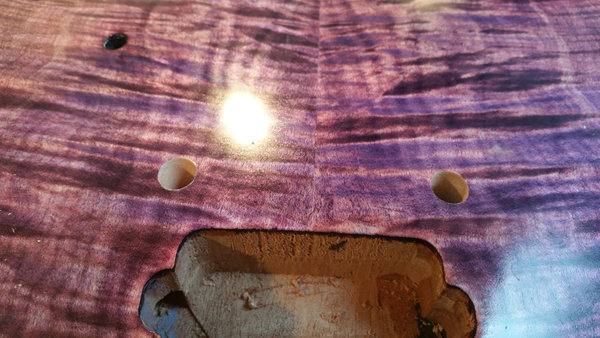 After
a few weeks of inactivity, due to my SO falling off a horse and getting
a collapsed lung a few fractured ribs, I finally did the
measurements, used my new transfer punch set, brad point drill
bits and cheapo drill press and made the holes for the bridge.
Then I hammered the anchor things into the holes.
After
a few weeks of inactivity, due to my SO falling off a horse and getting
a collapsed lung a few fractured ribs, I finally did the
measurements, used my new transfer punch set, brad point drill
bits and cheapo drill press and made the holes for the bridge.
Then I hammered the anchor things into the holes.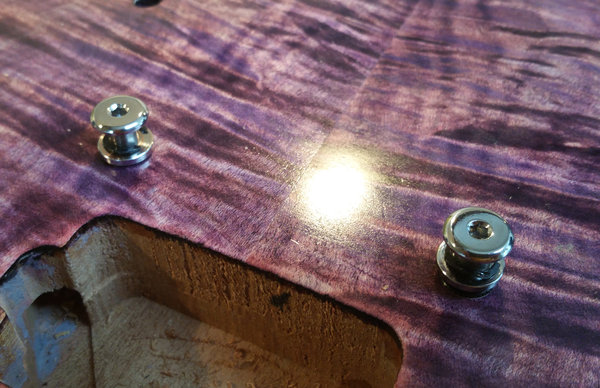 A test fit of the bridge revealed that I at least gotten the spacing correct on the bridge stud anchors.
 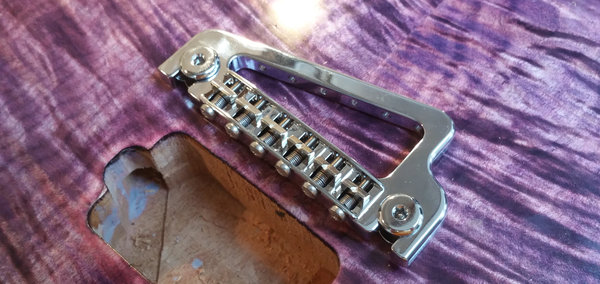 I moved the saddles all the way forward and then positioned the bridge
slightly ahead of the scale length because the hipshot features a
couple Allen screws which allow gross rearward adjustment of the
bridge.
I moved the saddles all the way forward and then positioned the bridge
slightly ahead of the scale length because the hipshot features a
couple Allen screws which allow gross rearward adjustment of the
bridge. 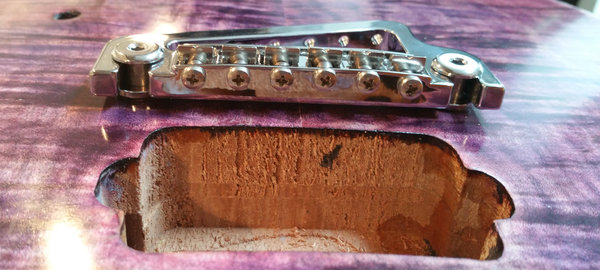
Once
this test fit was done, I could not resist. I quickly popped the
tuners into the headstock, set the Tusq XL nut in place and used the
dreadful string that came with the kit to string it up.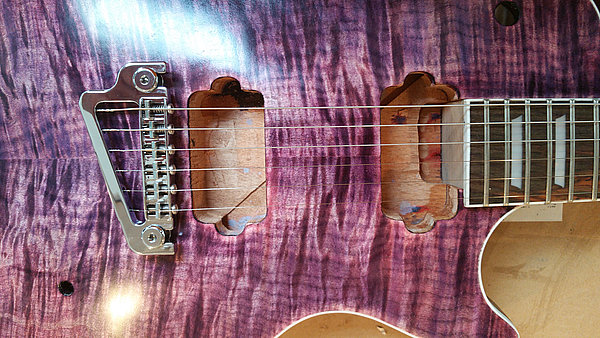 It
is evident that I should have positioned the bridge about a
millimeter more towards the treble side, since the strings are not
perfectly even up the neck. Not bad enough to be a real problem,
but less than perfect. Without any sort of setup beyond a real
quick intonation and raising the bridge just enough to get the strings
off the neck, I was able to play a few notes. To my mind,
installing the bridge was the major step that switches the build from
finish to assembly.
It
is evident that I should have positioned the bridge about a
millimeter more towards the treble side, since the strings are not
perfectly even up the neck. Not bad enough to be a real problem,
but less than perfect. Without any sort of setup beyond a real
quick intonation and raising the bridge just enough to get the strings
off the neck, I was able to play a few notes. To my mind,
installing the bridge was the major step that switches the build from
finish to assembly.